Hey Blogreaders!!I haven't posted in quite some time and life has been busy. I have some exciting new changes to let you all in on. I have moved from just outside of Boston, MA to a town in Northeast Florida! The boyfriend's Mom and stepdad live here (along with his two little brothers) and everything just happened to fall into place. Shortly after a December visit, the person who lived in the guest house of his 'rent's place moved out. A little while after that, the bf got a job offer here making more than he was making back home, with guaranteed hours. It was a no-brainer. We packed up, said our goodbyes and headed South.
We now live in a large and beautiful studio with a giant backyard. Florida is a huge change, seeing as I'd lived in one city up north for my entire life. Hell, I'd never even been on a plane until last December!
Anyway, this blog is going to need a name change, since I am no longer in Beantown. There will be more Florida adventures and pictures to come!
Monday, March 21, 2011

Monday, July 19, 2010
Name Change
Hey Followers!
Just letting everyone know, I've decided to change the name of this blog from The Vanilla Bean to Vanilla in Beantown. I just thought it was a little bit more original and accurate, since I'm Vanilla and I'm in Beantown (Boston). That's it for today, but don't worry, more blogs coming soon!
Just letting everyone know, I've decided to change the name of this blog from The Vanilla Bean to Vanilla in Beantown. I just thought it was a little bit more original and accurate, since I'm Vanilla and I'm in Beantown (Boston). That's it for today, but don't worry, more blogs coming soon!
Monday, June 21, 2010
It's Been Almost a Year....
Hey everyone!
I have seriously let this blog down in the past year and that upsets me. So in the coming months I'm going to be working harder on it. There are a few entries that are backlogged and need to be posted, as well as a few I'd love to write. I'm also thinking a custom background design is in order, to give it some personality.
I'm aching to write a tutorial on starting a freshwater community, but I want to wait until I set up my next one so I can take pictures and whatnot. So that probably won't be anytime soon. When I eventually start working on my saltwater pico, I'm going to make that into a series of posts since there's not too much out there about smaller saltwater set-ups.
One thing that's also been seriously neglected is horror reviews. I promise I will make up for that as soon as possible! The first one will probably be The Poughkeepsie Tapes, so look forward to it!
I'm also going to be going through past posts and fixing any mistakes as well as adding pictures where appropriate. If anyone has any tips on where to get/how to make a custom background scheme for blogs, please let me know in the comments!
Cheers,
Nilla
I have seriously let this blog down in the past year and that upsets me. So in the coming months I'm going to be working harder on it. There are a few entries that are backlogged and need to be posted, as well as a few I'd love to write. I'm also thinking a custom background design is in order, to give it some personality.
I'm aching to write a tutorial on starting a freshwater community, but I want to wait until I set up my next one so I can take pictures and whatnot. So that probably won't be anytime soon. When I eventually start working on my saltwater pico, I'm going to make that into a series of posts since there's not too much out there about smaller saltwater set-ups.
One thing that's also been seriously neglected is horror reviews. I promise I will make up for that as soon as possible! The first one will probably be The Poughkeepsie Tapes, so look forward to it!
I'm also going to be going through past posts and fixing any mistakes as well as adding pictures where appropriate. If anyone has any tips on where to get/how to make a custom background scheme for blogs, please let me know in the comments!
Cheers,
Nilla
Yummy Gummies (and easy too!)
And I've been slacking, as always. Well, here is a quick recipe entry for something sweet to snack on this summer!
Ingredients:
1 6 oz box of Jell-O (or knock off) mix
1 cup of water
Powdered Sugar or Corn Starch
Tools:
Measuring cup
1 small pot
Mold of some sort
A spoon
Directions:
In your small pot, boil 1 cup of water (does not need to be exact). When it's boiling, slowing mix in your jello. Keep stirring and boiling until it gets rather thick. The thicker it is, the more chewy your gummies will be. When it gets to the right consistency, turn off the heat. Slowly pour the mixture into your molds, and put it in the fridge or freezer. I used a silicone mold and forgot to grease it up first, but they came out fine. Had to use my fingers to dig them out in one piece though.
Storage:
There are probably lots of ways to store them, and my favorite would be a ziplock. Since I'm out of those, I used an old cream cheese container. If you don't want them to stick together, dust with powdered sugar or corn starch. I'm keeping mine in the refrigerator, but depending on how thick yours are, you may be able to get away with storage in a cool room.
Alternative:
To make them more gummy like, use 1 1/2 cups of water, as well as 2 teaspoons of knox gelatin. If you're vegan, use pectin instead.
Ingredients:
1 6 oz box of Jell-O (or knock off) mix
1 cup of water
Powdered Sugar or Corn Starch
Tools:
Measuring cup
1 small pot
Mold of some sort
A spoon
Directions:
In your small pot, boil 1 cup of water (does not need to be exact). When it's boiling, slowing mix in your jello. Keep stirring and boiling until it gets rather thick. The thicker it is, the more chewy your gummies will be. When it gets to the right consistency, turn off the heat. Slowly pour the mixture into your molds, and put it in the fridge or freezer. I used a silicone mold and forgot to grease it up first, but they came out fine. Had to use my fingers to dig them out in one piece though.
Storage:
There are probably lots of ways to store them, and my favorite would be a ziplock. Since I'm out of those, I used an old cream cheese container. If you don't want them to stick together, dust with powdered sugar or corn starch. I'm keeping mine in the refrigerator, but depending on how thick yours are, you may be able to get away with storage in a cool room.
Alternative:
To make them more gummy like, use 1 1/2 cups of water, as well as 2 teaspoons of knox gelatin. If you're vegan, use pectin instead.
Monday, September 21, 2009
Homemade Nachos
Greetings bloglovers! Sorry for posting one post a month and then skipping August! I'm a bad writer! I've been neglecting this poor blog, so today I decided to write a quick post about nachos.
All of us wish we could have delicious, warm, cheesy nachos at our beck and call. Well now we can! Because it's easy! All you need are these simple ingredients:
1 Bag of tortilla chips
1 bag of shredded cheese (mexican blend is best!)
1 baking sheet
1 oven preheated to 350 degrees
Spread your chips on a baking sheet to make a single layer. Sprinkle cheese on the chips. Make sure to cover every last bit of chip. Put the baking sheet in your already preheated oven and keep an eye on them. It'll happen rather quick. Once the cheese starts to melt and you see a little bit of golden brown cheese somewhere (just a little!) it's time to pull them. Let them cool a little, then dig in. Personally, I don't let them cool, but I though if I told you to just dig in, you might burn yourselves and try to sue me. Not fun!
All of us wish we could have delicious, warm, cheesy nachos at our beck and call. Well now we can! Because it's easy! All you need are these simple ingredients:
1 Bag of tortilla chips
1 bag of shredded cheese (mexican blend is best!)
1 baking sheet
1 oven preheated to 350 degrees
Spread your chips on a baking sheet to make a single layer. Sprinkle cheese on the chips. Make sure to cover every last bit of chip. Put the baking sheet in your already preheated oven and keep an eye on them. It'll happen rather quick. Once the cheese starts to melt and you see a little bit of golden brown cheese somewhere (just a little!) it's time to pull them. Let them cool a little, then dig in. Personally, I don't let them cool, but I though if I told you to just dig in, you might burn yourselves and try to sue me. Not fun!
Friday, July 17, 2009
Bento Fever!
I've been dabbling bentos lately. I really love http://lunchinabox.net/ for ideas and tips. I learned that you can premake rice balls and freeze them, so I've been making batches of star (squeeze the rice into a star cookie cutter!) shaped rice "balls" and freezing all of those in a plastic bag (sans the individual wrapping as Biggie suggests- I get along just fine without it and not doing that saves plastic!)
The great thing about these, is that they're easy to make, you control what you eat, you don't have much waste left over from them because most of the materials can be reusable.
Since I've been stuck in my house since April, I finally got to use everything I've learned last Saturday at my first training session at the aquarium. I don't have any pictures because I was in a hurry, but this week I'll try to take some.
Someday I wanna spring for "real" bento gear, but what I have is more than adequate. My box is a cheap tupperware with a cover that has a rubber band seal and a tab on each side that goes down to lock the box. I got it for $1 at my local dollar store. I also have chopsticks, that I am not proud of. You see, I went to the store to buy a pack of chopsticks. My brother already had the red ones, so I grabbed the white ones that way we wouldn't mix them up. I opened up the package to use them one day, and they did not feel like plastic. They were smooth and almost earthy. I looked at the package and almost cried. They're made of ivory. I really thought that for $2/12 pack they would be just plastic.
I usually carry my whole set up in a small (about the size of a dictionary) cloth tote bag that I got for free online somewhere or another. If there's something that needs to be insulted, I use a foil/Styrofoam envelope that was the wrapper of a pack of mochi I got at my local Asian food mart. I had to save it because it's a perfect insulator.
I packed 2 of my star shaped rice balls, a cupcake cup full of sliced up grilled chicken, another cupcake cup full of fresh strawberries, and filled any gaps with fresh cherries and those little fruit jello cups (saved the cups to reuse for making my own jello)from Asian markets. The result was great. It was enough to keep me going for the remaining 4 or so hours of training, and this is a really on your feet job, so I'm surprised so little filled me up. I also got a compliment on my arrangement during lunchtime! I did not expect that.
The great thing about these, is that they're easy to make, you control what you eat, you don't have much waste left over from them because most of the materials can be reusable.
Since I've been stuck in my house since April, I finally got to use everything I've learned last Saturday at my first training session at the aquarium. I don't have any pictures because I was in a hurry, but this week I'll try to take some.
Someday I wanna spring for "real" bento gear, but what I have is more than adequate. My box is a cheap tupperware with a cover that has a rubber band seal and a tab on each side that goes down to lock the box. I got it for $1 at my local dollar store. I also have chopsticks, that I am not proud of. You see, I went to the store to buy a pack of chopsticks. My brother already had the red ones, so I grabbed the white ones that way we wouldn't mix them up. I opened up the package to use them one day, and they did not feel like plastic. They were smooth and almost earthy. I looked at the package and almost cried. They're made of ivory. I really thought that for $2/12 pack they would be just plastic.
I usually carry my whole set up in a small (about the size of a dictionary) cloth tote bag that I got for free online somewhere or another. If there's something that needs to be insulted, I use a foil/Styrofoam envelope that was the wrapper of a pack of mochi I got at my local Asian food mart. I had to save it because it's a perfect insulator.
I packed 2 of my star shaped rice balls, a cupcake cup full of sliced up grilled chicken, another cupcake cup full of fresh strawberries, and filled any gaps with fresh cherries and those little fruit jello cups (saved the cups to reuse for making my own jello)from Asian markets. The result was great. It was enough to keep me going for the remaining 4 or so hours of training, and this is a really on your feet job, so I'm surprised so little filled me up. I also got a compliment on my arrangement during lunchtime! I did not expect that.
Wednesday, June 17, 2009
Care Profile: Guinea Pigs
Boy oh boy, did I ever have a disaster the other morning. I was unclogging the filter on one of my fish tanks, and instead of cleaning it out after, I stupidly just put it right back in the tank and turned it on. Seconds later, the water in my tank was a murky brown. Use spring water to change my tanks and I don’t have any right now since it’s during the week, and of course with no car, I can’t very well get any. So I started freaking out since the usually prescribed method to deal with murky water is a massive water change. To top that all off, after being cleaned the filter stopped working. Luckily, I had a brand new 30g filter in my closet that my boyfriend bought me. That thing is powerful and it cleared the murk right up. Crisis avoided.

On to the topic at hand: Guinea Pigs
Often overlooked, Guinea Pigs are very neat little animals. That’s why I’m writing up a Care Profile of them for you! First a little bit about their origins. Their scientific name is Cavia Porcellus, thus many people often call them Cavies as well. Originally they come from South America, and today they are still considered a food item there and other parts of the world. Here in the good ole US of A, most of us consider them pets.
Diet: Adult Guinea Pigs, like all pets (and us humans too!) Need a varied diet to stay healthy and live to their full potential. They should have a daily staple of Guinea Pig pellets, which from what I understand, are a formulation of hay and other natural ingredients that have many of the vitamins and good stuff they require in their diet. You should also give them a nice pile of Timothy hay to graze on at their leisure. You can supplement their diet with leafy greens and give them fruit or vegetables sparingly. Always make sure they have access to fresh water, the most reliable delivery method being a standard gravity water bottle.
Companionship: Purchasing a lone Guinea Pig is ill advised. They are very social creatures and should have at least one same sex partner. Try to avoid mixing sexes unless you have them neutered. We all know that babies mean more babies and so on. If you get your pigs from different sources, quarantine them in different rooms for a few weeks to make sure nobody gets anybody sick. Having a friend will not stop your pigs from loving you as long as you handle them both everyday and make an effort on your part. Remember, Rome wasn’t built in a day and neither are friendships.
Housing: Do not use those so called “Guinea Pig” cages from the pet store. They are much to small for a single Guinea Pig, let alone two. Most Guinea Pig owners use “Cube and Coroplast” (or C&C) cages. Coroplast is a sign makers plastic, and you can get it a sign stores. Cubes are coated wire cubes that are intended for storage. You can buy them most anywhere you find household storage items. I’ll include a link to a full website dedicated to these cages at the end of this post. Whatever you choose to use for your cage, it should be at least 7 or 8 square feet per pair or single pig. Bigger is always better.
Bedding: Guinea Pigs are sensitive to dust (as with most small pets) and it can cause serious respiratory problems, so only use a bedding that is free of dust. Carefresh and Aspen shavings are often reccomended. Another method I recently learned about is much cheaper and cleaner. It involves lining the cage with a few towels (to absorb urine) and place a layer of fleece on top of that. You just do a daily spot cleaning to get rid of the poop and toss the bedding into the washing machine once a week to get rid of the urine. The best part is that the bedding is reusable and a one time cost.
Breeds: There are quite a few Guinea Pig breeds recognized by the American Cavy Breeders Association (ACBA). American is the most common breed and if you see you GP in the pet store, that’s probably what it is. Many of the other breeds have a continually growing long coat. If you want to keep their fur long, you’ll have to brush it daily and bathe them every so often. If you don’t want to deal with this, then carefully trim their fur to the desired length. Have someone experienced do it if you’re not sure how.

Links: Most of the information presented I learned from google searches and my friendAzusanga who has guinea pigs herself (In fact, all the beautiful pigs you see in this post belong to her!). Here are some of the sites I used that have much more information about Gps than this summary of care:
http://www.guinealynx.info/index.html (General Care Information)
http://www.cavyspirit.com/ (General Care Information)
http://www.guineapigcages.com (Lots of information about building C&C Cages!)
http://www.peteducation.com/article.cfm?c=18+1800&aid=2838 (Information about Guinea Pig Breeds)
More Pictures:

 [Thanks Azu for letting me use pictures of your girls!]
Well, I hope you enjoyed the first ever Vanilla Bean Care Profile! It’s been fun writing and researching this entry, but boy am I glad it’s done. I hope anyone looking to buy/adopt a guinea pig has gleaned useful information from it. Until next time, Wheek Wheek!

On to the topic at hand: Guinea Pigs
Often overlooked, Guinea Pigs are very neat little animals. That’s why I’m writing up a Care Profile of them for you! First a little bit about their origins. Their scientific name is Cavia Porcellus, thus many people often call them Cavies as well. Originally they come from South America, and today they are still considered a food item there and other parts of the world. Here in the good ole US of A, most of us consider them pets.
Diet: Adult Guinea Pigs, like all pets (and us humans too!) Need a varied diet to stay healthy and live to their full potential. They should have a daily staple of Guinea Pig pellets, which from what I understand, are a formulation of hay and other natural ingredients that have many of the vitamins and good stuff they require in their diet. You should also give them a nice pile of Timothy hay to graze on at their leisure. You can supplement their diet with leafy greens and give them fruit or vegetables sparingly. Always make sure they have access to fresh water, the most reliable delivery method being a standard gravity water bottle.
Companionship: Purchasing a lone Guinea Pig is ill advised. They are very social creatures and should have at least one same sex partner. Try to avoid mixing sexes unless you have them neutered. We all know that babies mean more babies and so on. If you get your pigs from different sources, quarantine them in different rooms for a few weeks to make sure nobody gets anybody sick. Having a friend will not stop your pigs from loving you as long as you handle them both everyday and make an effort on your part. Remember, Rome wasn’t built in a day and neither are friendships.
Housing: Do not use those so called “Guinea Pig” cages from the pet store. They are much to small for a single Guinea Pig, let alone two. Most Guinea Pig owners use “Cube and Coroplast” (or C&C) cages. Coroplast is a sign makers plastic, and you can get it a sign stores. Cubes are coated wire cubes that are intended for storage. You can buy them most anywhere you find household storage items. I’ll include a link to a full website dedicated to these cages at the end of this post. Whatever you choose to use for your cage, it should be at least 7 or 8 square feet per pair or single pig. Bigger is always better.
Bedding: Guinea Pigs are sensitive to dust (as with most small pets) and it can cause serious respiratory problems, so only use a bedding that is free of dust. Carefresh and Aspen shavings are often reccomended. Another method I recently learned about is much cheaper and cleaner. It involves lining the cage with a few towels (to absorb urine) and place a layer of fleece on top of that. You just do a daily spot cleaning to get rid of the poop and toss the bedding into the washing machine once a week to get rid of the urine. The best part is that the bedding is reusable and a one time cost.
Breeds: There are quite a few Guinea Pig breeds recognized by the American Cavy Breeders Association (ACBA). American is the most common breed and if you see you GP in the pet store, that’s probably what it is. Many of the other breeds have a continually growing long coat. If you want to keep their fur long, you’ll have to brush it daily and bathe them every so often. If you don’t want to deal with this, then carefully trim their fur to the desired length. Have someone experienced do it if you’re not sure how.
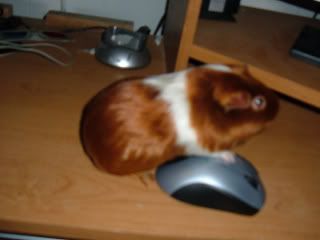
Links: Most of the information presented I learned from google searches and my friend
http://www.guinealynx.info/index.html (General Care Information)
http://www.cavyspirit.com/ (General Care Information)
http://www.guineapigcages.com (Lots of information about building C&C Cages!)
http://www.peteducation.com/article.cfm?c=18+1800&aid=2838 (Information about Guinea Pig Breeds)
More Pictures:
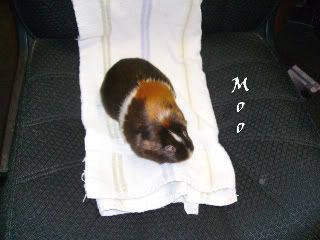
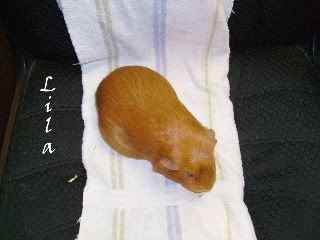
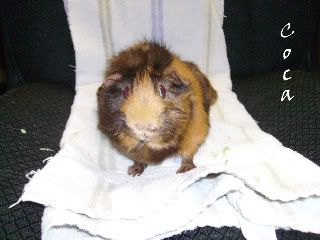 [Thanks Azu for letting me use pictures of your girls!]
Well, I hope you enjoyed the first ever Vanilla Bean Care Profile! It’s been fun writing and researching this entry, but boy am I glad it’s done. I hope anyone looking to buy/adopt a guinea pig has gleaned useful information from it. Until next time, Wheek Wheek!
Subscribe to:
Posts (Atom)